This page gives more background on the LamPI GUI functions and how to start the LamPI system the first time. The LamPI GUI can be started with the following command: http://<your-IP>/index.html
However, a new and blank system does not have any switches or sensors configured which makes so therefore you have to make a configuration, which is explained in the section below. And most importantly, the LamPI daemon "LamPI-node.js" must run, as it is the spider in the web of every LamPI configuration. It sends all system information to the GUI such as updates devices information and sensor values and receives user updates from switches and dimmers. The daemon does also interact with all sensor devices to receive updated sensor readings.
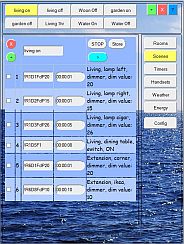
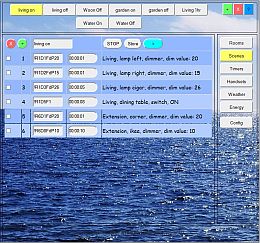
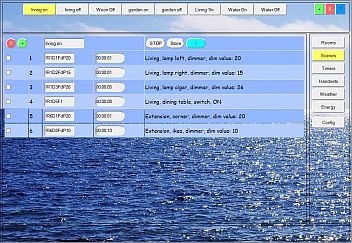
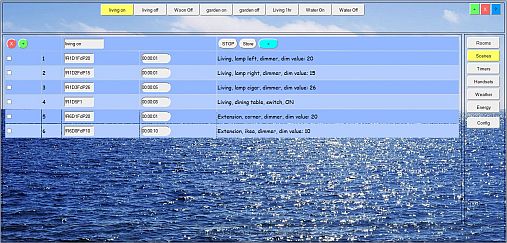
First let's explain a little more on the LamPI screens. The LamPI screen is devided in the following regions:
In the remainder of the documentation pages, we will refer to these sections if we want to explain in more detail the various functions of LamPI.
There are scaling and non-scaling skins available for LamPI. For small mobile devices it is best to use a skin which has a compact layout and is specially developed for mobile devices. For regular PC screens or tablets with large resolution screens there are skins that will automatically reorganize parts of the screen so that its content will be accessible.
The scaling skins adapt to the width of the screen (or window) automatically. These skins start with "scale-" in their filename
LamPI needs a working configuration file "~/config/database.cfg" in order to function correctly. This database.cfg file will be read by the LamPI daemon proces