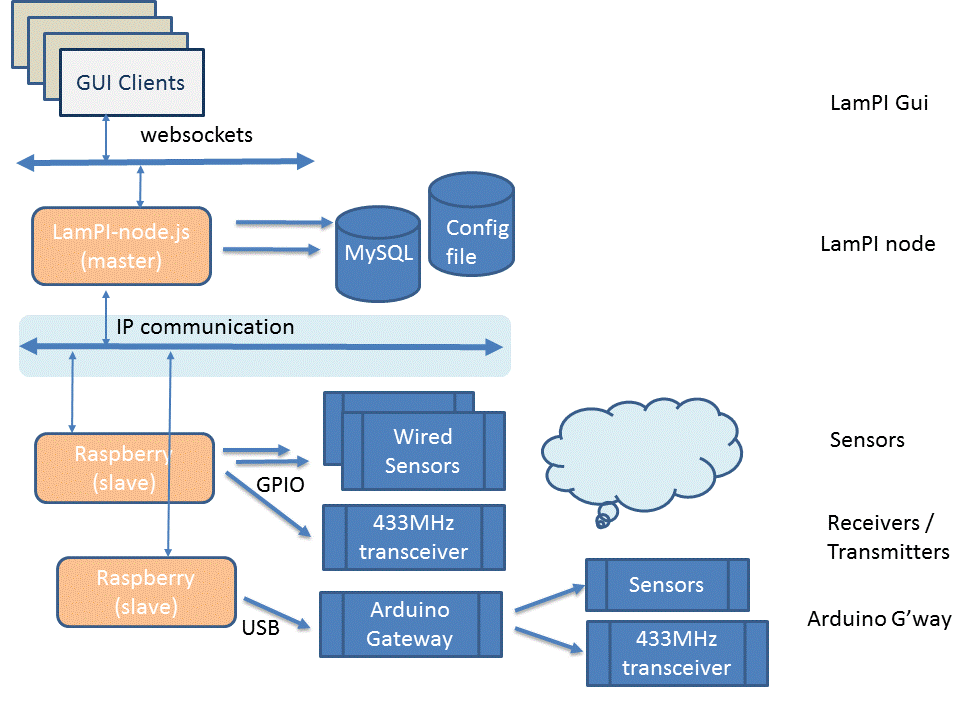
As I explained elsewhere in the documentation, I decided to off-load the Raspberries with all transmitter/receiver work and use Arduino's for that purpose. Arduino's are relatively easy to program, their additional cost is next to nothing and since they do not have the overhead of a Linux OS, their real-time behavior out of the box is much better than that of a Raspberry.
So the Arduino Gateway is a device which is connected to the Raspberry master of slav nodes by USB. It will transmit 433MHZ commands to all devices known to the LamPI system, and receive 433MH device (=handset) messages and sensor messages and report back the values to the raspberry node.
As the Arduino sensor nodes NEED (!!!) a Arduino Gateway device to decode their messages and send back values to the system, the Arduino Gateways is very important to the LamPI system and provides valuable insight in sensor measurements over time (trend graphs).
The picture above shows how Arduino Gateways are connected to Rapsberry master and slave nodes over USB.
The first version(s) of the gateway were based on the Arduino Nano as the engine of the gateway. The Nano has 32KBytes of memory which is surprisingly much when we're looking at all the C-code necessary for libraries and program sketches. Maybe you would think that the Arduino Nano is not powerful enough or does not have enough memory to perform this function, however, for most household use the Arduino is more than capable to perform this function.
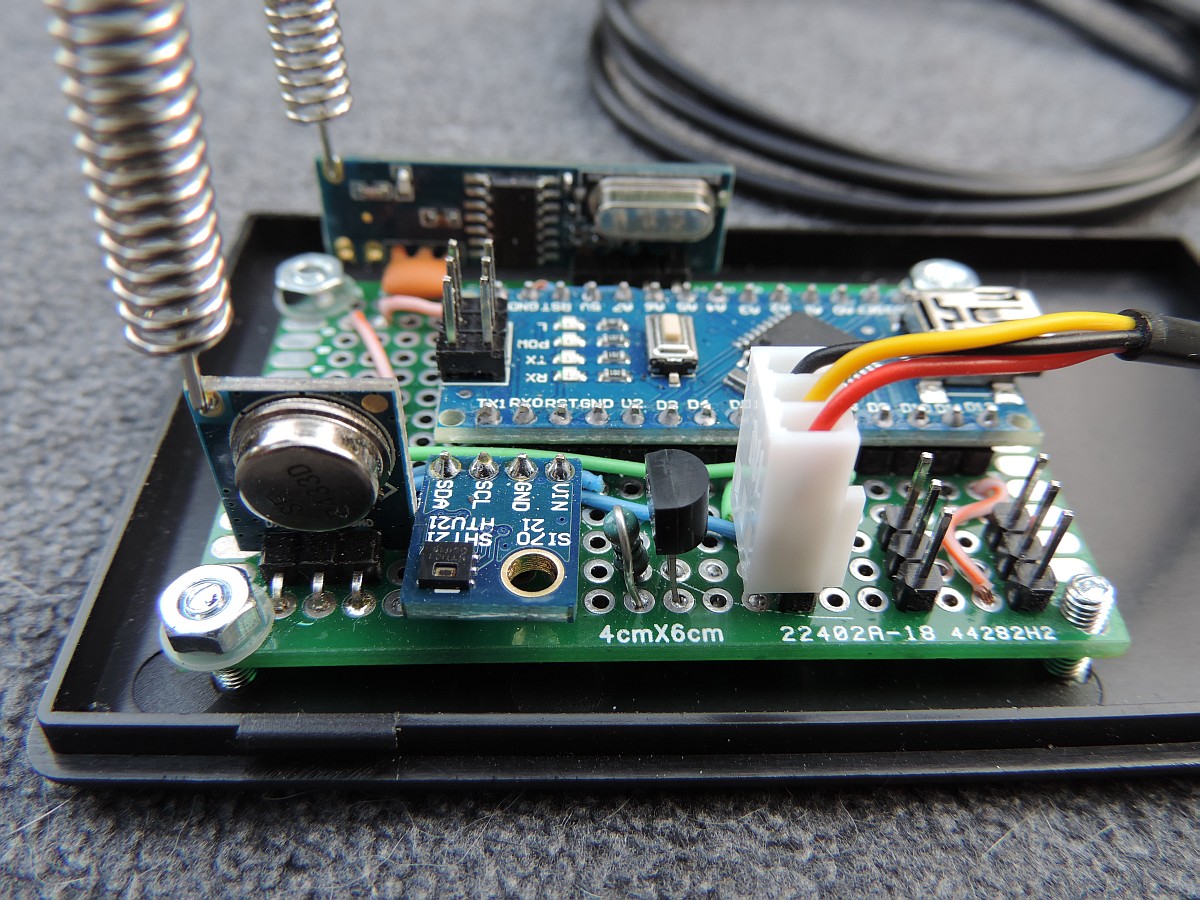
Just a few wires are necessary to make the hardware of the Arduino Gateway work:

I made three versions for use in our house: One for every floor that we need covered by sensors and/or devices. Below you see the second sensor.
 |
|---|
|
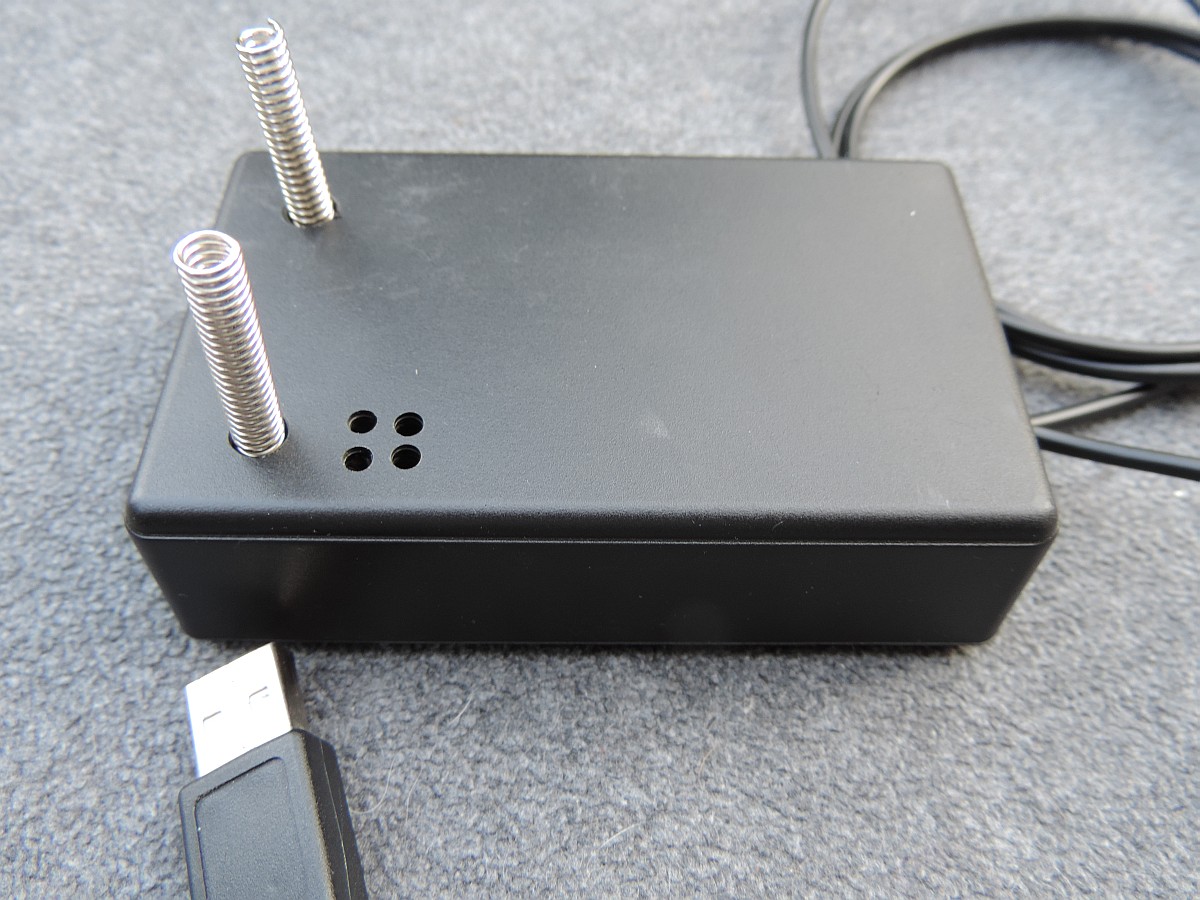
As you ca see in the picture above I found a nice enclosure box for the Arduino Gateway. I'm not sure I will use it though, as despite my efforts to get a good airflow in the box the temperature sensor reading is more than 3 degrees higher than that of an environmental sensor that is not in a box.
 |
|---|
|
Although the Nano proves to be sufficient for most cases, especially for mine, when having I2C and Dallas sensors the nano runs out of memory quickly.
In order to get more program memory than the Nano, I decided to buy a Mega. The mega has MUCH more memory and will allow implementation and simultaneous running of almost all protocols without problems. That does not mean however that it is smart to enable all supported receivers at the same time: Not memory but time to handle all protocols in one (1) interrupt cycle would be a problem.
So what can we do now with the Mega that we could not do before with the Arduino Nano? Good questions. As I said, I normally would not need the additional memory for the following reasons.
OK, having said all those sensible things, I could imagine that you want the Arduino Mega because it would allow more error and diagnostic help messages, check for all kind of conditions and allow real-time configuration of enabled sensors and message receivers. Also you can use the Mega to implement better administration features, something that the Nano just does NOT have the memory support for.
As said, for my own use I do not really need it, except when building stuff and not need to worry about memory usage in the first place. And also, I like to keep the version for the Mega a superset of the standard version, so all library functions and supported protocols should work on both versions, and only administration and real-time information should be different.
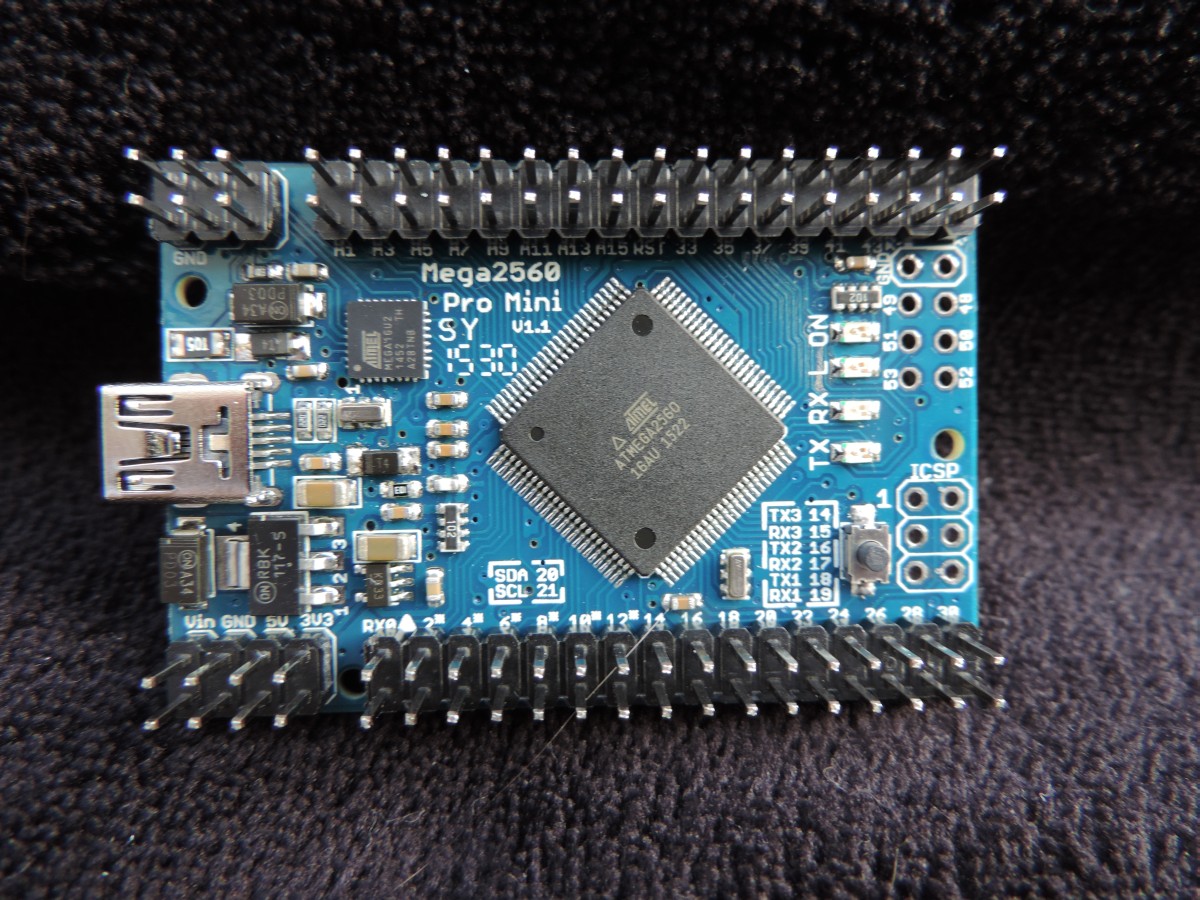
For the development version I bough the standard version of Ebay for around 7 Euro. however, I like the new Arduino 2560 Pro-Mini a lot and probably I will use that version for production version. This version is around $13.50 including (free) shipping, but worth every penny.
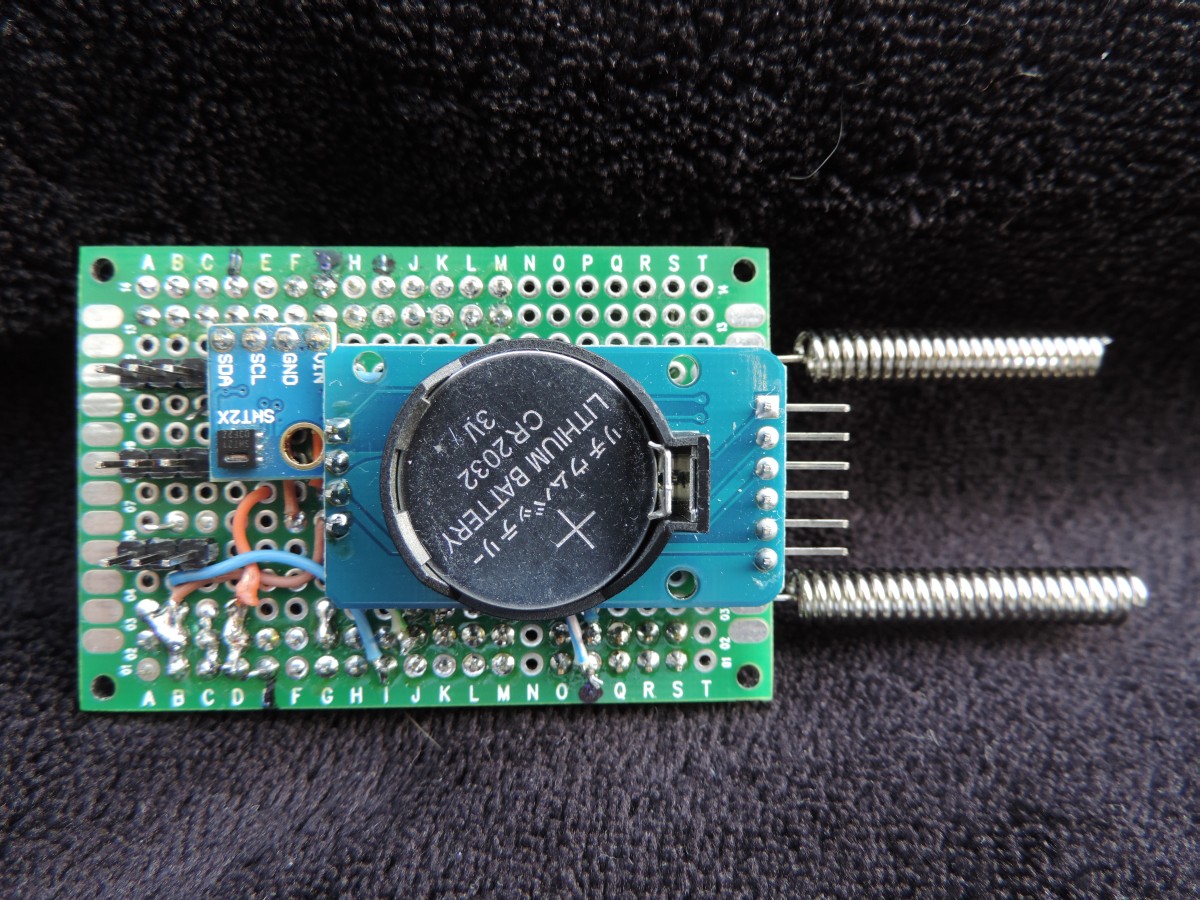
With a small board on top I made a sandwich construction. The board in the picture below will be placed on top of the Arduino (in the picture above).
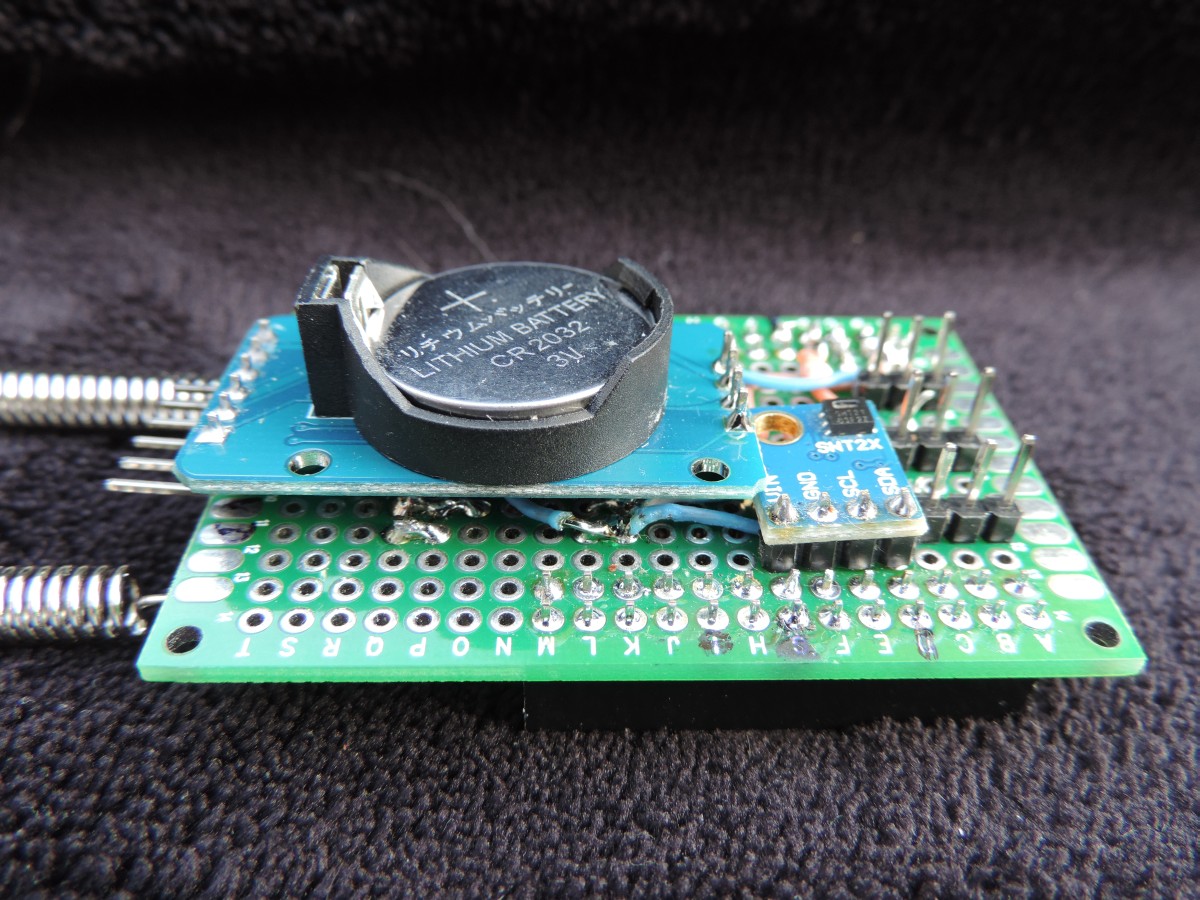
The "big" sensor on top with the CR2032 battery is the Real-Time Clock (RTC) and it is obviously so big because of its battery holder.
As shown in the pictures, the Meag has several on-board sensors which saves us battery energy, wireless pollution etc by having these sensors wired to the Arduino Gateway. The following sensors are found on my Arduino Mega Gateway:
The message format of messages exchanged between the Raspberry and the Arduino Gateway is defined on the following page(s). Because the Arduino is very limited in memory, the messages exchanged are integer encoded and are therefore kept simple.
If there is any more descriptive messaging needed, we do it on the host side and can make an interface like the Serial Monitor to interface the Arduino especially for LamPI.
I had planned to write a section on performance of the Arduino system compred to the wired solution used by LamPI before. I do not even like to do this anymore. The Raspberry is a powerful system and as such it can be programmed to perform (near) real-time tasks. However, the Arduino is a very cheap device and its performance is sufficient for home automation use and it does not have the overhead of a Linux operating system. In other words: it is fast and reliablt (and cheap).
And after doing some less scientific tests on the Arduino environment I had to conclude that the Arduino makes less errors and recognized 433 incoming messages with better accuracy. So I do not want any other solution.
On the Raspberry side the interface to the Arduino Gateway is implemented by the ~/exe/LamPI-arduino executable. Sources are in ~/receivers/arduino directory.